


Import member data
Import your members from an Excel file during initial setup
Go to the Excel import
Go to MEMBER → Import from Excel. The field structure will be displayed.
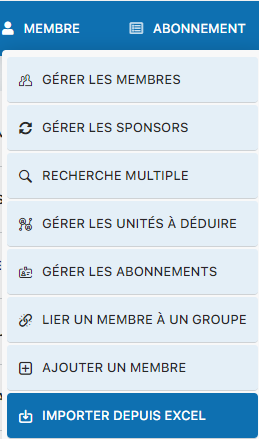
Image 307: Access to the import menu
Check the data structure
Read the help displayed at the top of the page to understand the structure. Make sure columns A, B, and C of your file match the expected ones.
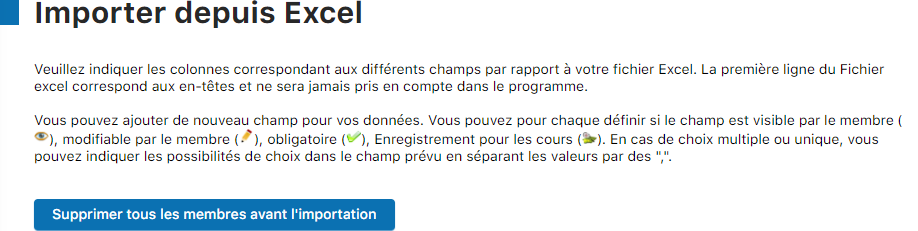
Image 308: Import field structure
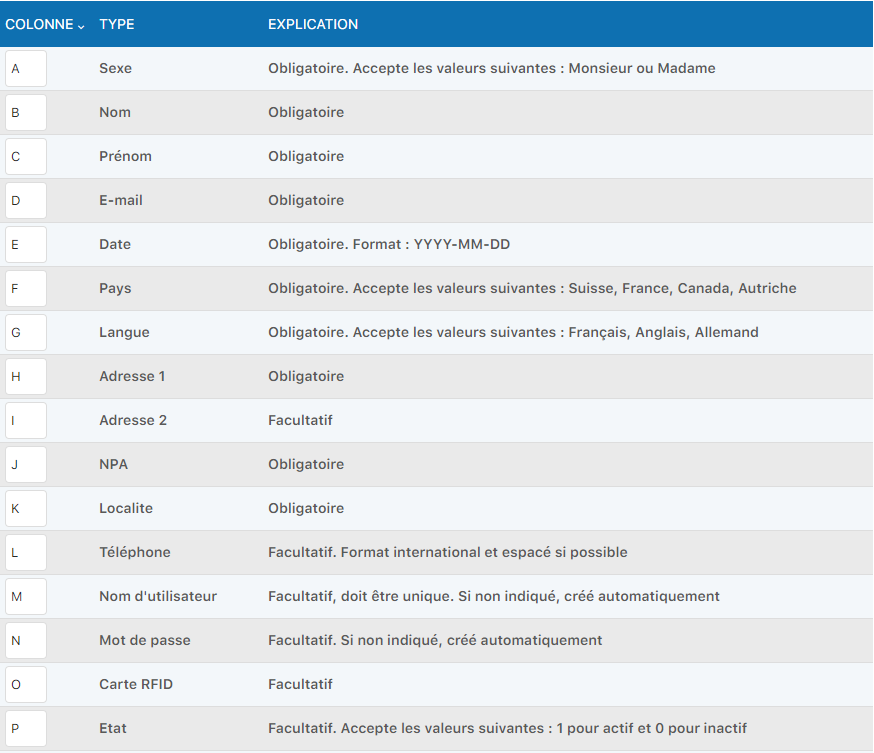
Image 309: Detailed help part 1
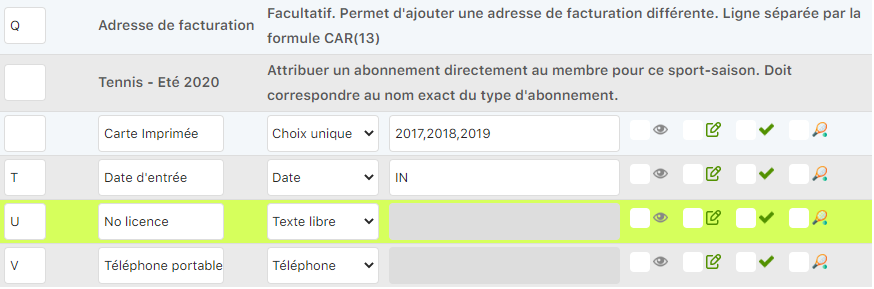
Image 310: Detailed help part 2
Select and import your file
Choose your Excel file and click "Import" to start the import.

Image 311: File selection and import
Add a custom field
To add a custom field, click "Add a new field".

Image 312: Button to add a new field
Configure the field with the following settings:

Image 313: Field configuration interface
- Column letter: Specify the Excel column (e.g., W)
- Field name: Give the field a name (e.g., "Leave date")
- Type: Select the data type (date, text, number, etc.)
- Input type: Choose how to enter the data (IN = calendar for dates)
Available checkboxes:

Image 314: Visible to member

Image 315: Editable by member

Image 316: Required field
Click "Validate column changes" to apply the changes.

Image 317: Confirmation of the added field
Delete a field
To delete a field, completely clear the associated data, then click "Validate column changes".

Image 318: Complete clearing of the field's data
Warning
During initial setup, you can delete all existing members before importing a new list.
Plugin.ch Manual — Chapter 8: Manage members
Professional documentation